
In part 2 of this series, I discussed how I hosted a game at my house.
Unfortunately we had run out of time, and Stew and P had to depart. The kid was convinced that we ought to keep playing, so rather than wrap things up where they were, we played on! (and on and on).
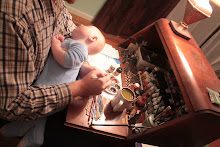
 |
| This is how I felt after the game... |
The next turn the Highlander unloaded into the Crusader, the now fleeing Quickdraw, and then stomped the Wasp to death. In the middle of the board the Battlemaster tried to evade the AC20 of the Huncback, and on the right side the various lights maneuvered around. The Hermes II destroyed another Wasp.
 |
| Four Wasps enter, and three are burning wreckage |
On the left the Highlander and the quickdraw-crusader duo fight it out rather inconclusively, as with a mighty +4 to the target number to hit the Highlander was missing nearly all its shots. Near the middle everything seems to be trying to batter down the Battlemaster while the other FWL 'mechs tried to prevent that. That pretty much defines the rest of the game.

More of the same, although now the Crusader is fleeing from the Highlander which is following very very slowly at one or two hexes a turn. Maneuvering for a shot at the Battlemaster, the Phoenix Hawk is unceremoniously shoved off a cliff, but manages to land on its feet. Then it overheats. I realized here that the Highlander had the range to the Battlemaster with its LRM20, and that the Stinger could spot for it... indirect fire followed.

Different lighting suggests that this game is going on for a long time, and that is so! The Quickdraw decides to jump over to the action in the center, hoping to get a shot at the rear of the Capellan Crusader. The Locust gives up on trying to kick things and charges the Gladiator, but misses. (good thing too, as it ran something like 8 hexes for the charge) The last of the Wasps is killed.

Final action:


The Battlemaster rather belatedly flees the action, but is shot to death, losing 3 of four limbs. The Quickdraw, which had been leaping about with a damaged leg for most of the game finally goes down.

Closeup of the demise of the Battlemaster

 |
| The Battlemaster finally goes down! |
In the end, with only one 'mech remaining relatively unharmed, the FWL surrendered and negotiated to get their surviving pilots back. The Capellans gained quite a lot of salvage... unfortunately most of it pretty wrecked!
Lessons learned from all of this:
- Battletech is fun!
- Battletech is slow!
- Hosting games is fun!
- Hosting games is also a lot of work!
Stay tuned for part 4, where I discuss some of the rules issues we had, and a few other general thoughts about the game.

4 comments:
Very complicated. But at least it sounded like it was an overall fun experience.
For faster play, would offering control of only solo mechs an option for each player?
Rather jealous that your offspring is so eager to play with you! My son would get bored quickly.
Hey Dai!
yes, rather complicated to control 8 mechs each, 4 is more reasonable, and the heavies and assaults were a problem too because they have more weapon systems and more armor to chew through before they are destroyed/crippled.
As for the kid, it is hard to resist the lure of a fully set up battle, particularly when you have already gone part of the way through it.
Looks like you had fun ;) Nice photos and write up.
I had a great time learning the ropes of battle tech. It’s a nice game and would play again anytime. 😀
The mechs looked cool too. 😀
Post a Comment