Thursday, December 31, 2015

Imperial Infantryman's Uplifting Primer: Damocles Gulf Edition

Just a quick one today, but earlier this week I read the Imperial Infantryman's Uplifting Primer: Damocles Gulf Edition which is a slim book from Games Workshop published "in universe". It purports to be a guide book given to each recruit in the Imperial Guard, which lists some of the basics for lasgun stripping, aliens (Orks: brittle boned cowards, much less muscular than they appear!) and the like. The book is rather dated now in terms of 40k background, but it was still fun to read, and I appreciated that I was able to get it from my local library, rather than spend the money needed to buy it on Amazon.

This edition of the book adds information about fighting the Tau, which was humorous enough, but it did have a couple of pictures of suitable interest that I copied them here.


The first picture shows the difference between a fine citizen of the Imperium, and a Tau sympathizer.  There are not many pictures of Imperial citizens, so this was interesting.  The second one shows the Tau "blood god" to which captives will be sacrificed.  It occurred to me, that it would indeed be interesting to have Tau cultists, subverting the greater good for their ancient gods, but alas, current 40k has the space commies as being fairly "clean" aside from possible trickery with regard to the various subject/ally races.

Anyway, a fun little book if you can read it for free, but surely not worth $200 to buy it from Amazon.

A little bit of Theater - Part 4

As you no doubt read in part one, two, and three, I ordered the Monarch Theater from Multiverse to build as a gift for my wife.

With the theater built and spray coated, I found myself unable to work on it for a few weeks. As I write this, I am frantically painting this in an effort to get it done by Christmas, and have had several painting sessions with the main body and details to that end.


The picture above is the first painting session, and shows a selection of the craft paints I am using.  I remained surprised at just how much paint the HDF sucked up, as I had to paint some sections two or three times to get an even coat.  On the "stone" work I used this to my advantage, as the mottled look of partly absorbed paint gives a good look I think.


In this picture, I am using tissue paper and black paint to make a tar paper roof.  Common in this area, tar paper (or felt) is rolled out on flat roofs, and sealed with tar on the edges, and sometimes has a gravel overlay.  Given our climate, the blackish paper turns light gray very quickly, and older roofs are nearly white. Anyway, this technique is one I read about in model train forums, and it is both very quick and very cheap.  I can go into more detail if anyone is interested once this is all done.


Here is more work on the tar paper (still needs some weathering), and the finished marquee with a few coats of glow in the dark varnish.  It is pretty old, so I am not sure it will work, but if it does it should be a nice surprise effect behind the black text.


Int he above picture, I have painted the second segment of the building with its first coat. The rear of the building is still separate to allow me to work on the interior. I remain surprised (somehow) at how much paint gets absorbed by the HDF, with many segments taking more than one coat to establish color, even over the spray paint. .

Wednesday, December 30, 2015

Star Wars Costumes: The Original Trilogy


 Over the last few weeks, I have been very slowly working my way through Star Wars Costumes: The Original Trilogy, provided as usual by my local library. Originally, I got this book with the intent of showing it to my kids, but it had rather fewer pictures of completed costumes than I expected, and the text was much more interesting, so I ended up reading it.  Far too large for bedtime reading, (being coffee table sized), it took me a while to get through.  The book is lavishly printed on high gloss paper, which makes it hard to photograph, but it has a ton of interesting information (as one might expect) about Star Wars costuming, but also about costume design generally, which I think allows it to carry over into design for Inq28 figures, or role playing games more generally.   Other than reminding one that John Mollo is a genius, and that George Lucas has very specific ideas on how things look, it also really made me think about costume choice and design in a way that I had not before.

Below are a few pictures of things which I thought might be interesting for future reference. The pictures were taken at night with my cellphone, so they are not the best (plus the glossy paper), but I think you get the idea (and can click on them to enlarge in any case).
Different rebel helmets
These are rebel helmets from A New Hope, which show the various variants for different pilots. The two red and white ones I find to be particularly interesting.
This Lando design needs to be made for space roleplay
Lando went through a few designs before they ended up with space pimp, but the picture above seems like he would fit into the 40k universe nicely as some sort of governor or rogue trader.
Pig faced Orcs in SPAAACE
Is that first picture of the Gamorian a pig faced orc or what? Not even a blaster on him.
Rebel Techs
There were several sections about rebel technicians from the Hoth base, and the RotJ scene where Admiral Akbar is addressing the fleet. Unfortunately there are not too many pictures of the concepts from this project, since the discussion is excellent, and regular rebels are fairly underrepresented generally.
Original Akbar design, showing his helmet and a more complicated yoke for his outfit
Another interesting part of the book was discussing the use of military styling vs. civilian styling to emphasize the warlike nature of a character and the end of conflict at the end of RotJ. Specifically cargo pockets were used for "warlike" clothing, and no pockets or smooth flat pockets for "peace" clothing. This made me think about how we adorn Inq28 characters, because most of the bitz we have for figure construction are from soldiers, and they end up making Inquisitors look like they are in the middle of the battle of Verdun, when at least some times, and for some characters, they should look like they are going to court instead.  Something to consider next time you are putting a figure together.

A little bit of Theater - Part 3

As you no doubt read in part one and two, I ordered the Monarch Theater from Multiverse to build as a gift for my wife.

I left the build last at the point of completing major construction, about 3 hours into the project. During my third annual November hobby weekend, I managed to sink a great deal more into the project, totally completing construction, interior work, some detailing, and then spray painted the lot.

I also ran into my first two problems.

First was due to the lack of instructions (at the time of this writing now provided on the Multiverse site)

As you can see here, the sides of the marquee are built of fiber board and fiber card.  However, they do not reach from the top to the bottom of the piece.  Here, the top is just resting on the side pieces.  As it turns out, there are small curved pieces of fiber board that connect the card and board together to complete this section of the building, but I am not sure why they were not simple joins.

The second problem was revealed during the build of the platform and staircase.

It might be a little hard to see here, but the center leg of this railing piece is bent into place because it is about a millimeter off.  I thought laser cutting was supposed to avoid these things?  Anyway, it worked out in the end.

Stylistically, the stairs are not my favorite, as they are a bit steep, and have pretty high railings, as can be seen in the picture below (with the baneblade officer as a handy scale figure)

I spent a ton of time on the interiors of the building, including hinging a couple of the doors.  This reinforced my belief that I am not very good at scratch building, and that "measure twice, cut once" appears to be particularly pertinent when you are fatigue drunk, and really should have stopped cutting new material.  So let us skip over that until I am able to get back in there and clean it up.

I spray painted the exteriors with a cream spray, reasoning that it would make a good background color for an art deco building.  As I had read about online, the MDF seemed to absorb quite a bit of the spray, either that or the cream spray was not very covering. Also seen in the picture is a scratch/junk built air conditioner unit, which seemed necessary to dress up the roof a bit.

Tuesday, December 29, 2015

Custom Dice


As a last minute Christmas craft gift for some of the people we exchange presents with, my wife came up with the idea of "Foodie Dice", or rather came up with the idea of copying the Foodie Dice.  For those unfamiliar, this is a way to deal with First World excess by reducing the choice of what and how to cook to the roll of dice.  Emergent cooking if you will.

The details of replication were left to me, and I found a set of 1" wooden cubes on amazon, and read a few tutorials about making stickers using our Silhouette Cameo, and away I went.  I produced four sets of six dice, and banged them out rather quickly thanks to using the Cameo's print and cut feature, which allows you to design both the print and cut portions of a project at once. I was able to make 144 identical squares, and as they were on sticker paper, applying them to the cubes was easy.

I think that it would be extremely easy to produce a custom dice this way, and could even use symbols in place of the squares provided they were not too complex in shape.  Think X-wing dice, or weather dice, body locations, and the like.  Unfortunately I was not able to find wooden blanks for other common dice shapes, although I suppose you could use this to place stickers on regular dice.  For actual game use, I suspect that a couple of coats of spray sealer would be useful for longevity, and a stain for the wooden blocks might add some interest as well.

You might also see in the foreground a partial imperial eagle... I was after all sitting there with the design software, and it seemed rude not to produce something for my hobby while I was there... this test did not come out quite right (the blade hung up on cutting the beak of one of the heads, and the stickers were just a bit small to handle without tools), but now it will be a simple matter to make an imperial eagle stencil.

A little bit of Theater - Part 2

As you no doubt read in part one, I ordered the Monarch Theater from Multiverse to build as a gift for my wife.

After a couple of weeks, my wife was out of town for an evening, and the kids were asleep, so I was able to put in some time, and here is where I got:

Decorative pillar with three pieces of MDF, and a card overlay for added detail

Floors coming together

This is going to be a tall building (206mm)
I glued everything with plain old white glue, applied with a toothpick

These windows, while odd in a theater, are nicely made of three layers of MDF and card
I apparently did not take a picture of my stopping point, but I did get all of the decorative pillars attached, and now just need to work on the marque and the rear staircase.

Thoughts:
  • There were no instructions with this kit (at the time of writing forthcoming to the website), but I was able to puzzle out where most of the parts went pretty quickly.  Years of model and LEGO building pay off! 
  • The detail was engraved nicely, and I hope it lasts through painting. 
  • All of the cuts were very clean, and some of the pieces more or less came out on their own. 
  • The scale of the building listed on the website is 28-35mm, and it is clear that some aspects of this kit are aimed at the larger side of things. Windows and the ticket sellers booth in particular are clearly aimed at taller models, although the doorways are a bit wide and short for regular 28mm miniatures, and would seem too small for the larger figures. You can see this in the third picture, which has my converted Necromunda Bounty hunter in the shot for scale. Even with a base, the ticket booth is too tall for him, and the doors are a bit short. 
  • I am not a fan of the way the doors are handled (an attached flat bit on the bottom),and plan to replace them with some sort of hinge. I do think that it makes them playable very quickly, which for most people is probably key. 
  • Construction took me about 3 hours to complete the major building and its decorations, which would have been about 2.5 hours if I had instructions, and probably less if I had built a laser cut building before. 
Stay tuned next time for more pictures of this build. 

Monday, December 28, 2015

A little bit of Theater - Part 1

Stock Kit from the Multiverse Website
In September, I saw a notice that Multiverse Gaming Terrain was selling a new Monarch Theater kit, and further, that you could get a custom cut name for it for only 3.95 Euro.  I immediately thought about buying and building it for my wife, which may seem a bit strange.  Let me explain.  My wife is a film major, and loves movies, as well as Art Deco theaters, so that part seems to fit nicely. She also has been dreaming of making her own movie for a long time (just like every film major), and adding a custom marque for the title of her dream movie seemed like a good thing to do.  I decided it would also be good to make use of the custom cut sign and make it look like our local art house theater.


Now, I have never constructed a laser cut building before, and had never ordered from Poland, and was not sure if I could hide such a large kit while I got it painted.  So I stewed on the idea for a while until the kit was actually released, and then decided to do it.  I also went a little bit crazy with some plans to customize and super detail the kit, which I may or may not actually complete... e.g. soldering new scale railing for the staircase.

Once the theater was actually released, I ordered one, and it showed up here on the West Coast just over a week later with my custom cut signs. Multiverse gave me a tracking number, so I was able to watch it travel around Poland and then to the US, which took some of the fear out of overseas ordering.  Everything seemed to be intact, although the envelope was ripped a bit (it might help to have taped the corners). I hurriedly hid it away in my desk before too many questions were asked, and it sat there for an opportunity for construction, which you can read about in part 2.

Wednesday, December 23, 2015

pre-Holiday run up

Sorry for the radio silence lately.  I have been busy with the usual pre-holiday madness, which in  this case means out of town family visits (played four games of Catan), and various obligatory events on top of shopping, crafting, and cooking.

Madness or not, it is nice to see my son and god daughter building Lego together
I am also working on a "secret" project for my wife, which has been absorbing hours and hours of time... you will see why when it is done. (seriously the biggest project I have ever done, and with only scant hours until the big day I have been pretty nervous about completing it).

I do have a series of posts scheduled to run after Christmas, and one of my good buddies will be in town from Philadelphia, so hopefully there will be some gaming to report on as well, after which service will return to normal.

Friday, December 11, 2015

12/11/2015 Paint Table

Conversions seen dimly here: Two flamers, bolt pistol arm, grenade throwing arm, guy with LAW on his back
Finished the pre ink/base stage for this next squad, just one more to go, and I will have done all the basic paint work for this platoon. This puts me at one command squad, one heavy bolter squad, three rifle squads, and a stormtrooper squad for ~53 figures painted. I am also starting to work on the company command squad, and you really can not justify having a company command for just one platoon... might need to get a couple more going. 

Monday, December 7, 2015

Pigma Micron Pens

Big Lee did a small test of a Uni Pin Fine Line Pen, testing to see how waterproof and smear free it was under different conditions. He then used them to draw tiny symbols on some 6mm Carthaginians, with some very nice results.

The pens in question are apparently not sold in the US, and imported are around $4 each (on Amazon anyway), so I thought it might be useful to do a similar test with some pens which ARE available here, the Sakura Pigma Micron Pens, which aside from being cheaper and more readily available, also seem to come in various sizes and colors.


So, following Lee's example, here are the four tests.
1. Gesso base, Black Micron 0.2mm written over brushed on Flat sealer (craft store)
2. Gesso base, Black Micron 0.2mm written over gloss (Future)
3. Gesso base, Black Micron 0.2mm written under brushed on Flat sealer (craft store)
4. Gesso base, Black Micron 0.2mm written under brushed on gloss (Future)

Conclusions:
Writing on the bare Gesso was very easy, and there was no smearing or other difficulties. Brushing the flat and the gloss over the top seemed to smear the ink, although I did it right away, so it is possible that letting it sit for 24 hours would reduce this. Interestingly the gloss seems to have pulled up the ink more than smeared it, so you have sort of a shadow effect as if you applied a wash, which is actually what I noticed when I used these pens way back when on some TOS destroyers, although at the time I attributed it to the wash I used. Writing on top of the flat and gloss was harder, and although it is a bit hard to make out due to glare, the writing is a bit more sloppy due to the tip slipping as I was writing.

I think that ideally you would put this on as close to bare paint as you could manage, and then spray a flat sealer over the top.  For some paint jobs this may mean adding more paint after you have "finished" a paint job, but I think it would give the best look.

Thursday, December 3, 2015

Ferrero Rocher

Yesterday, I discovered that in addition to being a tasty candy, Ferrero Rocher can also be useful for the hobby.

As is common during the festive season, companies begin sending us kickbacks holiday treats.  So nearly daily, various boxes of sweets, or dried fruit etc. show up at various staging places around the office, reminding us of our weakness for sugar and hastening our death.  Yesterday, the first of these showed up in the form of a flat package of Ferrero Rocher. As the tray began to empty, not at all hastened by my own efforts in that regard, the shape of the tray insert started to remind me of miniature bases.  Measuring the bottom of a piece of the candy at 30mm, I decided that it would serve, and when the opportunity presented itself, hid it away in my office.

Here is what it looks like (you can click to see it bigger if you like):

As you can hopefully make out from my picture, the tray is composed of two parts, a clear polystyrene tray, and an insert which provides slightly beveled holes for 48 pieces of the candy.


In this second picture you can see that the nominal 30mm base fits tightly, while the 25mm base is a bit loose. I shook the tray around a bit, and no figures fell over, which is good.  When I was putting all of this away, I tried one of those newfangled lipped 30mm, and it fit perfectly, not loose, nor too tight.

So keep your eyes open this festive season, you never know what you might see.

Tuesday, December 1, 2015

A Knight of the Seven Kingdoms

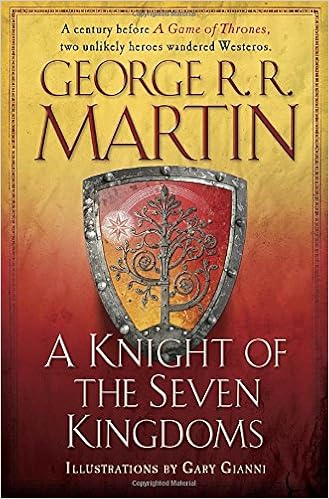
Picture cribbed from Amazon
Yesterday I finished reading A Knight of the Seven Kingdoms by George R, R. Martin, which is a compilation of three novellas featuring Ser Duncan "Dunk" the hedge knight, and his squire "Egg". Set a few generations before the events of the Song of Ice and Fire stories, you really get a feel for Westeros in a time of relative peace.  The stories are easier to read that the Song of Ice and Fire books, both because they have fewer characters, and because they are, as mentioned above, set in more peaceable times, so the outright horror of the other books is not as present.

Another interesting feature of this book is that it is lavishly illustrated, with over 150 illustrations of various sizes by Gary Gianni. [who apparently illustrated Prince Valiant for a while, which certainly carries over into his illustrations in this book] While the illustrations do not match the text exactly, they are excellent, and the book is probably worth paging through just to look at the pretty pictures... something you do not get to say about fiction books very often.  Amazon has a preview of the book which shows some of the pictures.

I really enjoyed these stories, and look forward to reading the promised 3-9 more when they come out... probably in 15 years at GRR Martin's usual rate.  Tales of knightly daring do, and honorable men in dishonorable company really appeal to me, and I like the setting, as there is even less magic than the War of the Five Kings era, and the military technology is transitioning from mail with plate to full harness.

I have discussed miniatures for Game of Thrones actions before, but while the Perry War of the Roses figures are suited for the War of the Five Kings (and plastic!), the earlier era is best suited by the Agincourt to Orleans line (now with its first plastic set, and forthcoming French set).  This is imperfect at best, since naturally a range aimed at Agincourt is focused on archers and wealthy men-at-arms in full harness, but supplementing with other Perry figures, Claymore Castings figures (particularly the Scots 1388 line), and other lines should do the trick.

Jousting figures heavily in the book, and playing a jousting game with just a few knights always sounds fun.  The 5th edition Bretonnian knights are ideal for this, but as those are more than a decade out of print, the Fireforge Teutonic Knights with some conversion would do nicely as well (particularly with some more "fantasy" heads).

Aside from miniature gaming there is plenty here to inspire for role playing as well, particularly in the middle story, which gets heavily into minor barony politics, and the various dynastic discussions.  A game like Pendragon seems ideal here.